Minimoto chains aren't o ring type like most motorcycle chains, they're just a very basic type working on metal on metal contact between the links. This means their life span is alot shorter but given the minimal amount of hours the bikes are used this isn't really an issue.
However due to the tiny size of the pinion sprocket and the rather huge RPM's they see, to get the most life and reliability you can from them its essential to keep up good maintenance.
So im a believer in cleaning it after every race meet along with a few other things ill post on later and of lubing the chain after every use. It seems to be the only way to get a decent life span from the standard chains. So here goes.
The tools you'll need. A 4, 5 and 6mm allen key for removing the appropriate parts, a chain breaker for the minimoto size chains and a brush along with either some petrol or kerosene.

1) Remove the footpeg bracket to get access to the chain. Unfortunately you cant take the chain off without breaking it due to the swingarm caging it in and these types of chain are continuous, not held together with a master link. thus the need for a chain breaker.

2) Next, slowly rotate the rear wheel and observe the chain links as they roll off the pinion sprocket. They should all roll of straight and unkinked. If they do roll off kinked its time for a new chain. Heres a picture of a worn out siezed chain that must be replaced.

Fortunately this one seems okay :)

3) On this bike the water pump mounts to the clutch bell and the belt is driven via the pinion, so Those must first be removed. First pop off the belt then remove the two bolts holding the pump on.


4) The 4x bolts holding the clutch cover on can then be removed and the cover removed in turn. This then allows you to take off the chain.
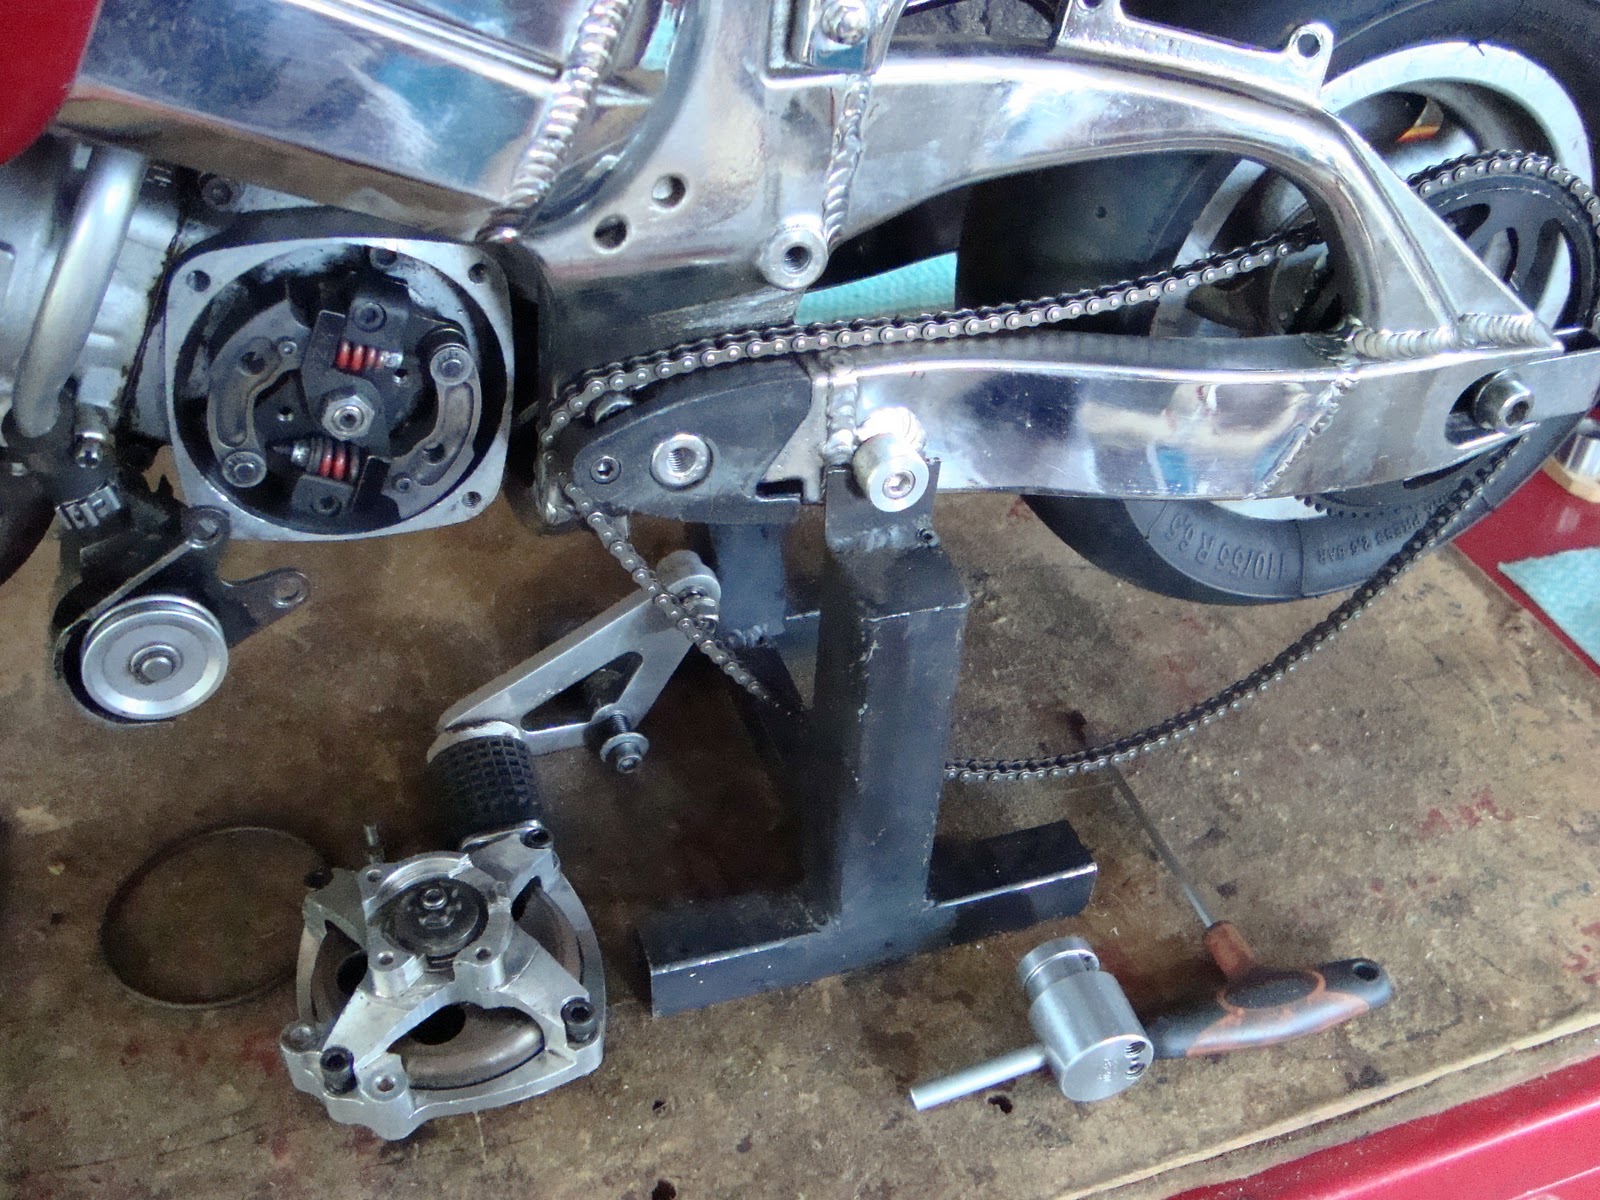
5) Pop the chain off the rear sprocket. Now is a good time to inspect the condition of a few parts. The chain slider - This one is in fine condition

Check both front and rear sprockets. They shouldn't be worn too thin and pointed at the tips and shouldn't have a hook pattern too them. These are both fine.


6) Now to remove the chain, a special tool is needed called a chain breaker. you can get them from most pocket bike part suppliers. What this tool does is to push a pin from the chain straight out so the loop can be broken. Here's the buisiness end of the tool. The flat tipped screw clamps the chain to keep it in place and the pin shaped one pushes the chain pin out.
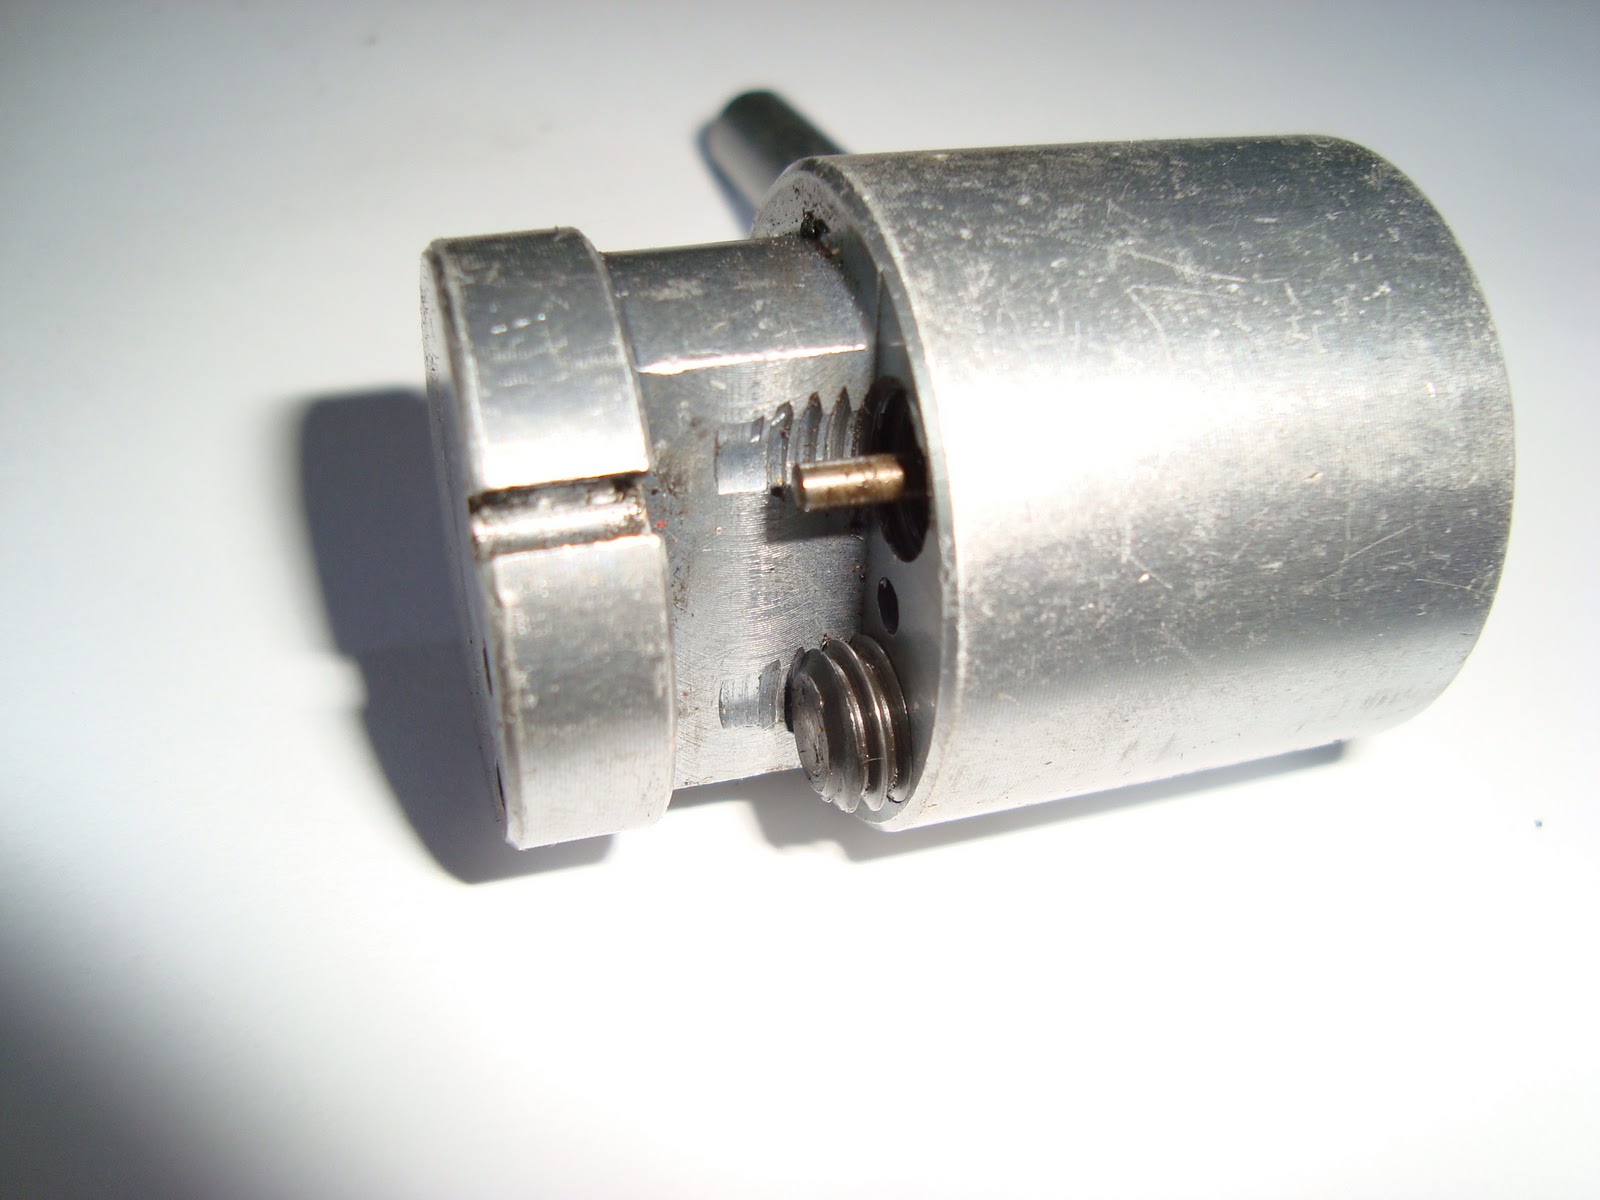
So Grab the chain and place it in the chain breaker. The pin shaped screw should be aligned with one of the chain pins and the clamping screw firmly holding the chain in place as shown.


Then screw in the pin shaped screw and out should come the chain pin! After backing off the screws and removing the chain it should then simply pull apart.

7) Grab a container (a fuel safe one) and fill it up with a bit of either kerosene or petrol. I use petrol because there's plenty of it about and its not a requirement to use kerosene on these chains as they have no O-rings to be ruined.
Put the chain in and stir it around with your brush a little. all the grime and dirt should loosen up eventually. Generally i leave the chain in for an hour or so until the petrol is filthy.

Ready!

8) Take the chain out and sling it around something and let the excess petrol/kero drip dry off it. Excuse my bodgey jig.

9) While your waiting for that to dry grab the brush and petrol and clean off the sprockets, front and rear. Just dab some petrol on the perimeter of each then wipe it clean with a rag after a minute or two.
Nice and clean!


10) Now take the freshly cleaned chain and loop it around the swingarm (dont make the mistake of joining it without doing this! its mega annoying) and put it back in the chain breaker. this time you'll put the pin in the flat ended screw and use the pin ended screw to clamp the chain. Then just simply wind the screw in to push the pin back in to the chain and join it.


11) Nearly there now. Simply install the chain back on the rear sprocket, put it around the pinion and bolt the clutch cover back in place and the water pump. MAKE SURE TO INSTALL THE O RING BELT BEFORE THE CHAIN!

12) Last step is to lube that sucker up :) Grab a can of chain lubricant. I just used any old brand i could find. Given the amount of times you lubricate the chain (once every use) the quality of it i doubt matters.

Then holding the tube against the BOTTOM of the chain spin the rear wheel while applying a generous amount for about two full revolutions of the chain. You must do this once after every use/ride to stop the chain binding up.

Now your ready to go! once you've done it once or twice the entire process should only take about 10 minutes. Well worth it for a long life chain :)

No comments:
Post a Comment